TL;DR
- Mac自带的python环境在有时会有第三方包冲突、python2和python3之间切换不方便以及第三方包安装需要root权限可能导致的安全问题等,所有就有了python虚拟环境,这里主要记录一下笔者在安装和使用pyenv以及virtualenv过程。
pyenv安装和使用
推荐使用brew安装pyenv
1
2
3
4
5
6
7
8
9
10
# Install Homebrew
/usr/bin/ruby -e "$(curl -fsSL https://raw.githubusercontent.com/Homebrew/install/master/install)"
# Install pyenv
brew install pyenv
# Add pyenv initializer to shell startup script
# ZSH USERS: use ~/.zshrc instead of ~/.bash_profile
# LINUX USERS: use ~/.bashrc instead of ~/.bash_profile
echo 'eval "$(pyenv init -)"' >> ~/.bash_profile
# Restart your shell for changes to take effect
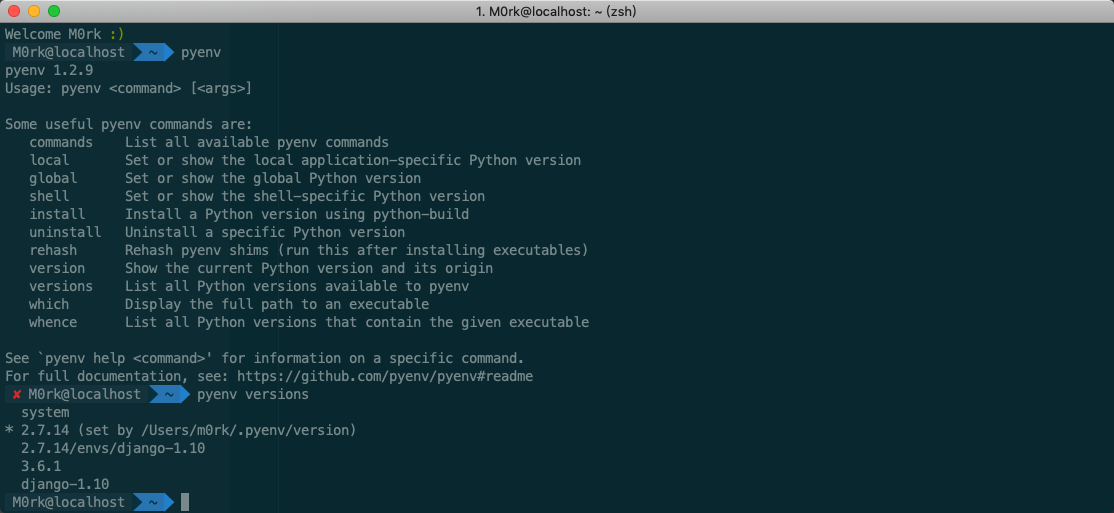
exec $SHELL使用pyenv install –list 查看可用的python版本
- 使用pyenv install 3.6.* 安装特定版本的python(建议安装个python2 和python3的环境即可)
- 查看已安装的版本 pyenv versions
- python环境切换 使用pyenv global xxx 或者pyenv local ,其中前者是全局的设置,而后者是针对当前项目python环境的设置,还可以使用pyenv shell xxx 设置当前shell的python版本,退出shell后失效。
- 在进行版本切换的时候,可能会出现AttributeError: module ‘enum’ has no attribute ‘IntFlag’或者raise ImportError(‘This package should not be accessible on Python 3. ‘
ImportError: This package should not be accessible on Python 3. Either you are trying to run from the python-future src folder or your installation of python-future is corrupted.这个错误,这个时候使用unset PYTHONPATH可以解决问题。配置pycharm
- 现实中我们往往可能需要使用pycharm这种IDE进行python的开发,那么如何在pycharm中进行python版本的自由切换呢?
- 其实pycharm 和idea都属于 jetbrains家族产品,使用上面很是类似。
- 打开一个项目,选择file-> Default Settings-> Python Interpreter-> show ALL -> +号 -> Existing environment -> 进行下拉框的选择就OK
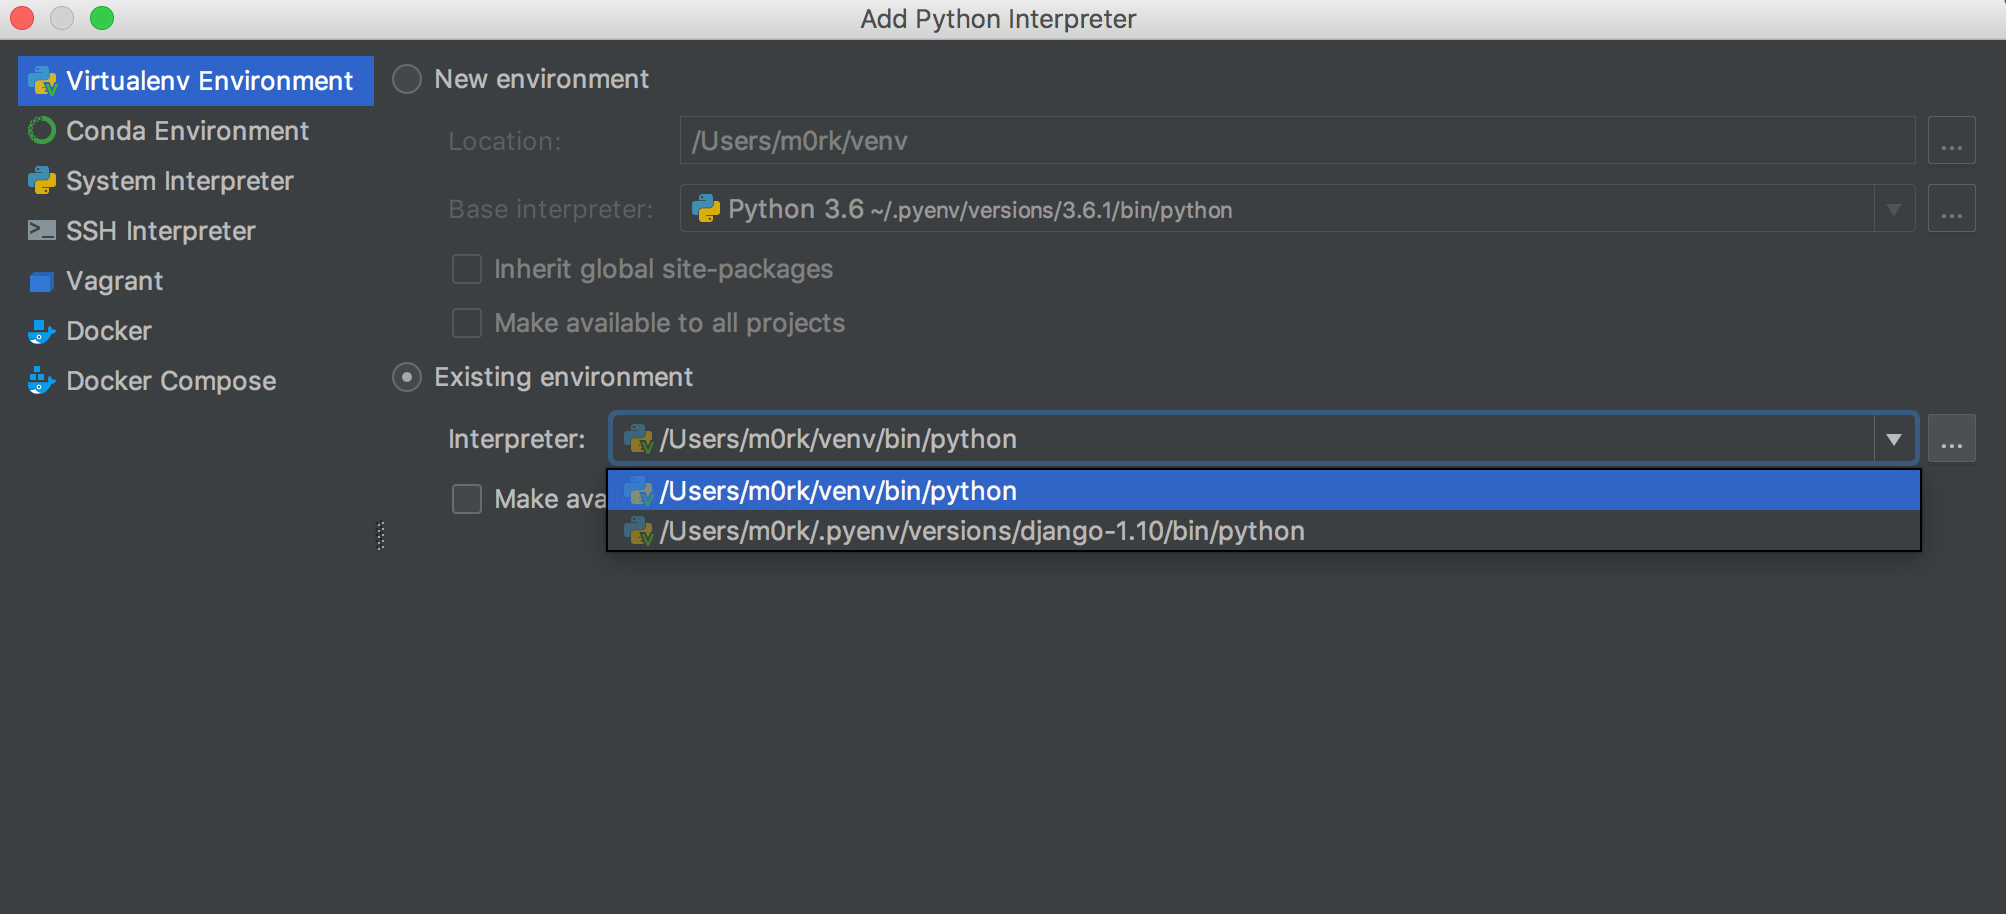
- 之后就可以通过添加完的Python Interpreter选择对应版本的Interpreter进行解释执行了。
virtualenv的安装和使用
- pyenv用于不同python版本之间的切换,还有一种场景就是在确定了python版本之后,需要第三方包不同版本之间的切换,比如不同版本的django版本之间的版本切换,于是就有了virutalenv。
安装(还是brew)
1
2
3
4
5
6
7
8
9
10
# Install Homebrew
/usr/bin/ruby -e "$(curl -fsSL https://raw.githubusercontent.com/Homebrew/install/master/install)"
# Install pyenv-virtualenv
brew install pyenv-virtualenv
# Add pyenv-virtualenv initializer to shell startup script
# ZSH USERS: use ~/.zshrc instead of ~/.bash_profile
# LINUX USERS: use ~/.bashrc instead of ~/.bash_profile
echo 'eval "$(pyenv virtualenv-init -)"' >> ~/.bash_profile
# Restart your shell for changes to take effect
exec $SHELL创建一个虚拟环境 例如 pyenv virtualenv 3.6.1 django-1.10
- 激活这个虚拟环境 例如 pyenv activate django-1.10
- 安装对应版本的第三方包 pip install django==1.10
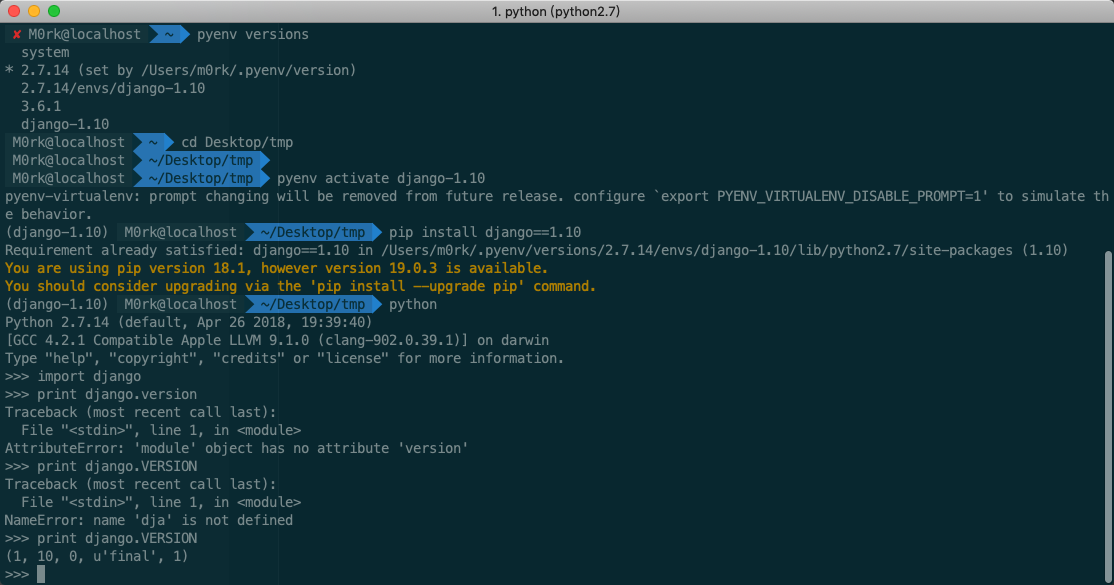
- 如上图所示,就相当于进一步定制化了环境(python2.7.14 and django==1.10)。
- 此外和上面配置pycharm一样对pycharm进行相应开发环境的配置。
- 退出当前的虚拟环境 pyenv deactivate xxx
python常见问题
- windows下pip安装速度慢解决方法 可以在使用pip的时候加参数-i https://pypi.tuna.tsinghua.edu.cn/simple
- 例如:pip install -i https://pypi.tuna.tsinghua.edu.cn/simple pyspider,这样就会从清华这边的镜像去安装pyspider库。
Reference
Python Development on macOS with pyenv-virtualenv Python多版本管理器-pyenv 介绍及部署记录